
If you have Author privileges in Yacapaca, go to More -> My Quizzes. You can ignore search for now, and go straight to Build a New Quiz:

This allows you to build a new quiz from scratch, drawing questions from the entire question bank (164,000 questions at time of writing). You can modify and improve existing questions, or create your own from scratch as part of the process.
When you click the button, the next thing you see is
 Please take the warning seriously. Your quizzes are public, and they carry your name. They should enhance your reputation with colleagues and potential employers. Quizzes with names like “Friday Test” will be removed like unattended bags at an airport.
Having named your quiz, you find yourself immediately on the Question Search page.
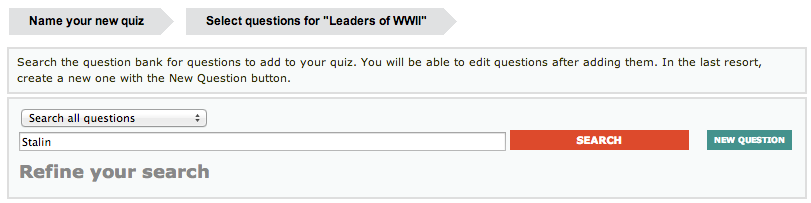
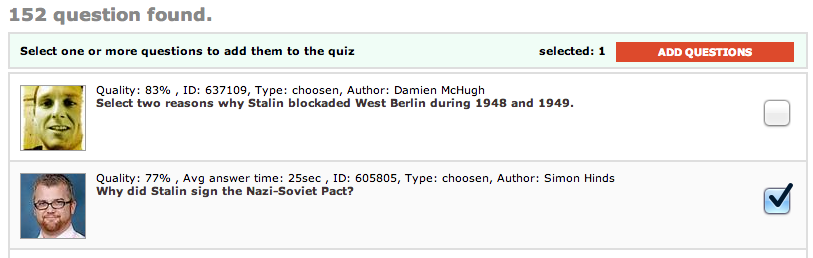
We already have lots of questions on the topic of your quiz. Trust me on this. Lots. The search interface makes it really easy to find them, too.
To view a question, mouse over the checkbox next to it. Check it to select. When you have all the questions you want from your first search, click Add Questions. Don’t worry, you can add more from other searches later, and you can modify the questions you have chosen. See below…
… but before we get to that, what if you really, really have to create your own question(s) from scratch? Use the New Question button. Notice how it will automatically tag the question with your current search term. Question tags are essential in Yacapaca and creating them via search is the easiest way to do it.
So, back to what happens when you click Add Questions. You now move to the Quiz page, with a header that looks like this:
![]()
Here is what the buttons do:
- Compile/Recompile: when everything else is ready, compile the quiz. This both saves it and prepares it to run. It is quite safe to compile repeatedl as you go along, simply to save your work.
- Edit quiz parameters: edit the pre-test instructions, add downloadable files and more. Take a look and see what else you can do.
- Gap analysis: control which key concept tags the teacher sees when the quiz results are in. Find out more more.
- Add questions: in the “Leaders of WWII” example, I’m going to use this button to add questions from separate searches for Stalin, Churchill, Hitler, etc. I will compile in between searches, just to be on the safe side.
Each question in the list looks something like this:
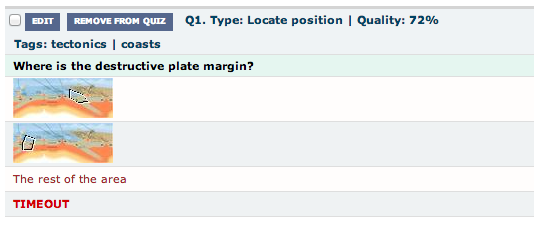
To the right there are usage stats which will be empty at this stage, but are extremely useful later when you want to improve the quality of your quiz. Note the two buttons:
- Edit: Opens the Question Editor. This is the place to correct grammar and spellings, update images or fix distractors that are too obvious or obscure.
- Remove from quiz: is self-explanatory
The checkbox allows you to select multiple questions and tag them, using the tag field at the top of the page
![]()
Why tag? When you start running the quiz you will need to analyse students’ responses. The most useful way to do this is not question-by-question, but concept-by-concept. For example, in my Leaders quiz, I shall tag each question by the leader it refers to, but also whether it addresses that leader’s actions or motivations. That will give me an instant overview of what I need to concentrate on when we review the material in class.
Finally, when you are all done, compile again. Don’t forget!
If you don’t yet have author privileges, you can apply for them here.
Read next – Tutorial 11: Question Types
You might also want to find out how to create new questions.

Leave a comment